Setting up a preschool art center means creating an open and inviting space where children are encouraged to explore materials, experiment with techniques, and express their thinking through art. The setup should invite curiosity while offering gentle structure.
In many child-centered classrooms, the art area is seen as a language. Children use color, texture, and form to communicate ideas that may not yet be expressed through words. A well-prepared Preschool Art Center respects this process by offering choice, accessibility, and time.
Curious about how to make your classroom more inspiring, organized, and developmentally appropriate? Read on to find out how to create a preschool art center that brings structure to creativity and supports children’s growth through purposeful design.
Why Is the Art Center Important in Preschool?
In early childhood classrooms, the art center functions as a key learning area where children actively develop essential skills through hands-on exploration. A thoughtfully designed Preschool Art Center supports physical development, emotional expression, cognitive growth, and independent learning within a single, flexible space.
Supports Fine Motor Development
Using tools like scissors, glue, paintbrushes, and crayons helps strengthen the small muscles in children’s hands and fingers. These fine motor skills are necessary for future writing, buttoning clothes, and handling utensils. The art center provides repeated, engaging opportunities for children to practice these movements in meaningful ways.
Encourages Creative Expression
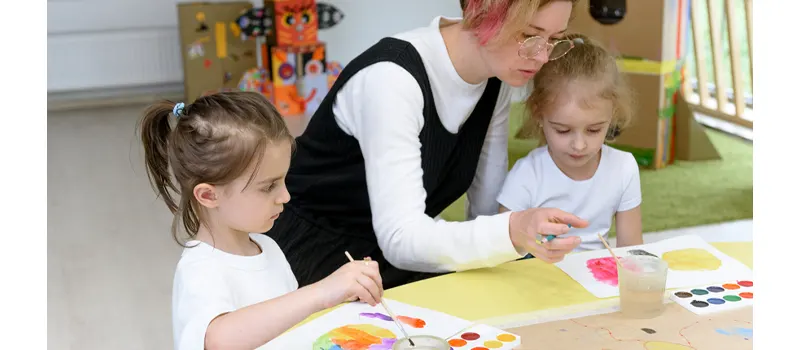
Art offers children a unique way to express their thoughts, ideas, and feelings without relying on words. This is especially important in the preschool years when language skills are still developing. The art center gives children the freedom to create without fear of being right or wrong, helping them explore their identity and imagination.
Enhances Cognitive and Problem-Solving Skills
When children plan a drawing, choose materials, or figure out how to construct something from paper and glue, they are engaging in critical thinking. The art process requires decision-making, sequencing, and experimentation, all of which strengthen cognitive development and early reasoning skills.
Builds Emotional Awareness and Confidence
Art allows young children to process emotions they may not yet be able to articulate verbally. It also gives them a sense of accomplishment when they complete a project. These experiences build emotional intelligence and self-esteem, helping children feel more confident in the classroom and beyond.
Fosters Social Interaction and Collaboration
Although art can be an individual activity, it often encourages children to share materials, discuss their work, and observe others. These interactions help build communication skills, empathy, and a sense of classroom community. The art center becomes a place where social learning happens naturally.
تعزيز الاستقلال والمسؤولية
By making materials accessible and encouraging children to clean up after themselves, the art center supports autonomy and self-regulation. Children learn how to make choices, follow steps, and take responsibility for their workspace—skills that are important for both academic and personal growth.
Before You Start Setting Up a Preschool Art Center
Before you start setting up an art center, you need a clear plan. The most important step is to decide what you want children to learn there and how the space will work in your daily routine. When you think through your goals, your group of children, your classroom layout, and safety and management needs, you can design a preschool art center that is both creative and easy to run.

Clarify Your Goals for the Preschool Art Center
Begin by asking what you want your preschool art center to do for children. Is your main focus fine motor skills, creative expression, language development, or independence with materials? Most teachers want a mix of these outcomes, but it helps to name your top priorities. When your goals are clear, you can choose materials, storage, and routines that support them rather than collecting random supplies.
Remember that the art area is part of your learning environment, not just a fun extra. Think about how art time will connect to your curriculum and to other centers. If you care strongly about child-led projects, you will design the preschool art center with many open-ended materials and lots of choice. If you want to build pre-writing skills, you may include more tools like different writing instruments, small paper sizes, and tracing opportunities. Your goals shape every detail that comes next.
Understand Your Group of Children
Next, look closely at the children who will use the preschool art center. Consider their ages, attention spans, language skills, and experience with art materials. A group of three-year-olds who are new to school will need fewer choices, simple tools, and very clear routines. They may start with crayons, chunky markers, glue sticks, and short-cutting practice with small pieces of paper.
A group of older or more experienced preschoolers may be ready for a wider variety of materials, such as different textures of paper, collage pieces, stamps, or simple printmaking. They might also be ready to manage more complex routines like choosing from several types of paint or using real hole punchers. By matching the setup of your preschool art center to the real abilities of your class, you set children up for early success instead of constant frustration.
Study Your تخطيط الفصل الدراسي and Traffic Flow
Your physical classroom is a key part of planning. Before you position shelves or tables, walk around the room and notice where children naturally move and gather. Look for areas with good light, access to water, and flooring that is easy to clean. The best location for a preschool art center is usually near a sink or a place where you can easily carry water, and away from quiet reading or rest areas.
Think about how children will enter and exit the art space. You want a simple flow so they do not bump into each other with wet paintings or trays of materials. Check sight lines from where you usually stand or sit so you can supervise the preschool art center while also watching other areas. A few minutes spent sketching possible layouts on paper, including table positions and shelf placement, can prevent daily bottlenecks and spills.
Review Safety Rules and School Policies
Safety and policies should guide your planning from the beginning. Before you purchase or set out any supplies, review your school’s rules about materials, cleaning products, and storage. Find out which items are allowed for children to use freely and which must stay in teacher-only areas. This may include adult scissors, hot glue guns, or certain types of paint or adhesives.
Consider allergies and choking hazards as you plan your preschool art center materials. Small buttons, beads, and other loose parts can be wonderful collage items, but may not be safe for every group. Think about how you will store these items, how you will check for broken tools, and how you will clean the space at the end of each day. When safety is built into your setup, you can relax more and focus on supporting creativity.
Plan for Management and Daily Maintenance
Before you start setting up the art center, decide how it will run during the day. Think about how many children can work there at one time, how they will know if a spot is open, and how long they may stay. Some teachers use name cards, clothespins, or simple picture symbols to show who is at the preschool art center. Planning this system in advance helps you introduce it clearly.
You should also think through clean-up routines. Decide where children will put used brushes, where wet artwork will dry, and how scrap paper and recyclables will be handled. Plan simple steps that children can follow, such as checking the table, washing hands, and returning materials to labeled spots. You do not need to teach every routine on the first day, but having a clear plan will help you present the preschool art center with confidence and guide children toward independence from the very beginning.
How to Create an Effective Preschool Art Center Step by Step?
Creating a preschool art center is a gradual process that combines space planning, material selection, organization, and daily routines. Rather than setting everything up at once, teachers can build the art center step by step so each element supports children’s independence, safety, and creative exploration.
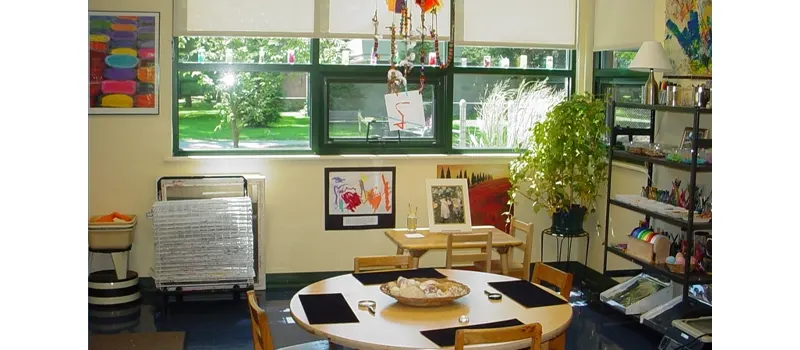
Step 1: Choose a Dedicated and Accessible Location
Begin by selecting a clearly defined area of the classroom for the preschool art center. The space should be easy for children to reach and positioned away from quiet zones such as reading or rest areas. Good lighting helps children see colors and details clearly while working.
The area does not need to be large, but it should allow children to sit comfortably, move materials, and work without crowding. A consistent location helps children understand that art is part of the daily classroom routine.
Step 2: Select Child-Appropriate Furniture and Work Surfaces
Tables and seating should match children’s height so they can work comfortably without constant adult assistance. Stable, flat surfaces support drawing, painting, and construction activities, while easy-to-clean materials help manage everyday mess. In a well-designed preschool art center, furniture supports independence rather than limiting it. Children should be able to sit down, begin their work, and leave the area safely on their own.
Step 3: Offer Open-Ended and Safe Art Materials
Choose materials that invite exploration instead of directing children toward a single outcome. Items such as crayons, washable paint, paper, clay, and collage materials encourage experimentation and personal expression.
All tools should be appropriate for the age group and stored so children can see and choose materials independently. A preschool art center works best when children are able to make choices rather than wait for supplies to be handed out.
Step 4: Organize Storage for Independent Use
Use clear containers, labeled bins, and low shelves to help children understand where materials belong. Storage should remain simple and consistent so children can return items easily after use. In an effective preschool art center, organization becomes part of the learning experience. Children practice responsibility, categorization, and care for shared materials through everyday routines.
Step 5: Establish Clear and Simple Routines
Children use the art center more successfully when expectations are clear. Focus on basic rules related to safety, respectful use of materials, and cleanup procedures. Visual cues can help reinforce these routines. Predictable routines allow children to work with confidence and independence. Over time, the preschool art center becomes a space where children know exactly what to do from start to finish.
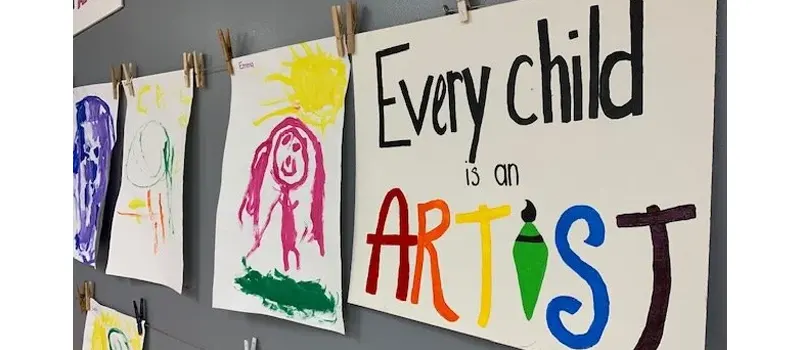
Step 6: Display Children’s Artwork With Intention
Displaying finished work helps children feel valued and respected. Artwork can be placed at children’s eye level, rotated regularly, and presented in a way that highlights effort and creative process rather than perfection. Within the preschool art center, displays also serve as inspiration. Seeing classmates’ work encourages new ideas and strengthens a sense of belonging in the classroom.
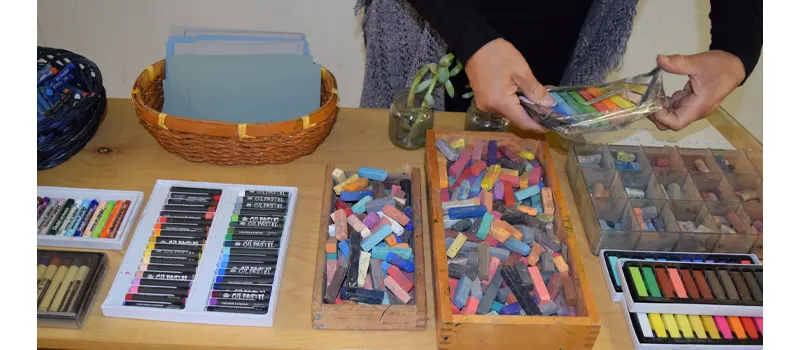
Essential Supplies for a Preschool Art Center
You don’t need to start with a fully stocked art center. A small collection of simple, versatile materials is more than enough to begin. As children explore and grow, you can gradually add new items based on their interests and abilities. The key is to keep things accessible, safe, and inviting. Below are the main categories of supplies to consider. Each one supports creativity and hands-on learning in a different way, helping you build a space where children can create with confidence and joy.
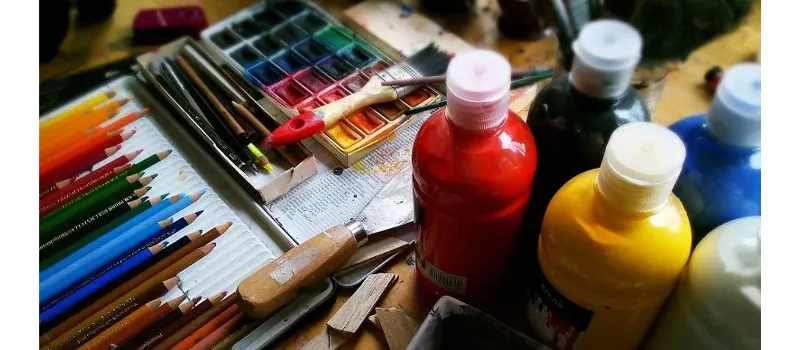
Drawing Tools
Drawing is often a child’s first way of expressing thoughts and ideas. Having a variety of drawing materials encourages mark-making, experimentation with lines and colors, and the development of fine motor skills. Thicker options are ideal for younger children, while finer tools offer more control for older preschoolers.
Suggested items include:
- Jumbo crayons and regular crayons
- Washable markers in assorted colors
- Colored pencils
- Sidewalk chalk or blackboard chalk
- Whiteboard markers (if using dry-erase surfaces)
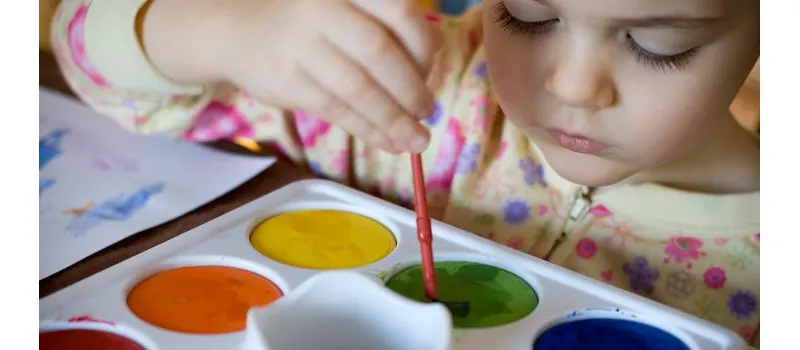
Painting Supplies
Painting introduces children to color mixing, brushwork, and large motor coordination. The texture and movement of paint help children explore their emotions and ideas through visual expression. Choosing easy-to-clean options and child-friendly containers helps reduce mess and increases independence.
Suggested items include:
- Washable tempera paint
- Watercolors
- Paintbrushes in various sizes
- Sponge brushes and rollers
- No-spill paint cups or trays
- Aprons or smocks
- Plastic table covers or drop cloths
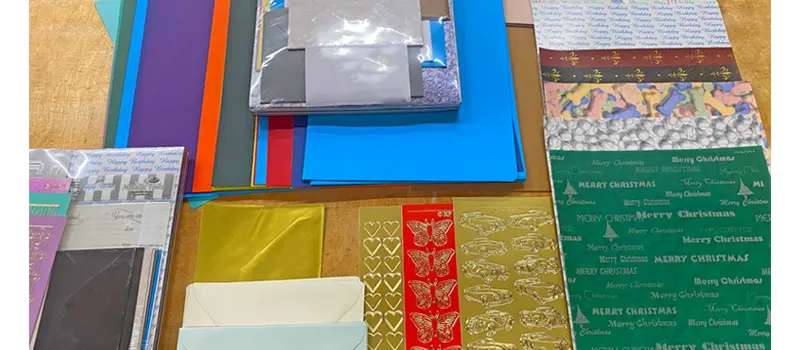
Paper Materials
Paper provides the foundation for almost every art activity. Having different types, sizes, and textures allows children to explore layering, tearing, folding, and more. Offering variety supports creativity and meets a wide range of project needs.
Suggested items include:
- White drawing paper
- Construction paper in assorted colors
- ورق المناديل
- Cardstock or cardboard scraps
- Recycled paper or paper bags
- Pre-cut paper shapes for beginners
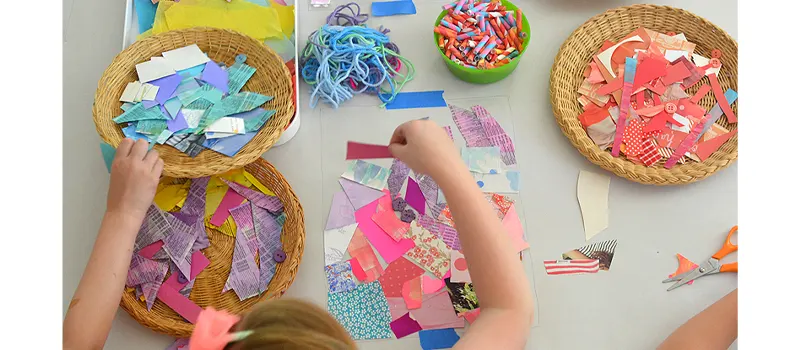
Collage and Craft Items
Collage materials encourage children to manipulate, sort, combine, and layer items in creative ways. This process builds spatial awareness and design thinking while strengthening hand coordination. Keep items organized in small containers so children can easily see and choose what they need.
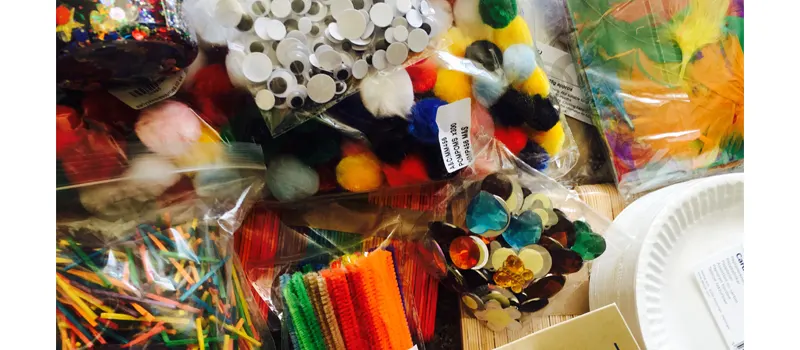
Suggested items include:
- Glue sticks and liquid glue
- Child-safe scissors
- Buttons, beads, and pom-poms
- Feathers and fabric scraps
- Pipe cleaners and yarn
- Natural items like leaves, twigs, or seeds
- Recycled materials such as bottle caps or cardboard rolls
Storage and Organization Tools
An effective art center depends on accessible, labeled storage that children can use independently. A clutter-free space allows for better focus and helps children take responsibility for cleanup. Storage doesn’t have to be expensive—what matters most is clarity and consistency.
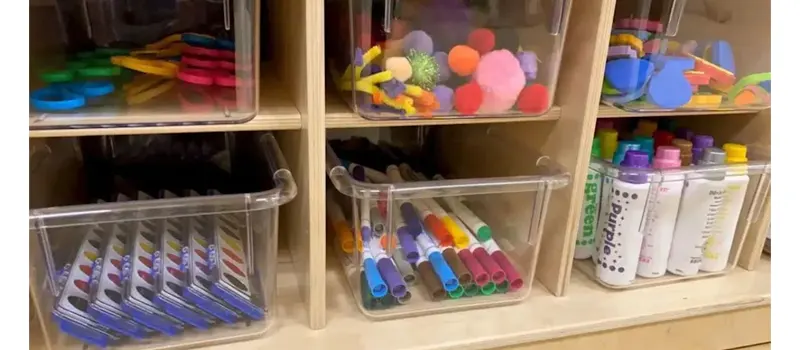
Suggested items include:
- Clear plastic bins or trays
- Open shelving units at child height
- Labels with pictures and text
- Drawer organizers for small items
- Rolling carts for mobile art centers
- Containers with lids for messy materials
Drying and Display Supplies
Once children finish their work, they need a place to let it dry and a way to share it with others. Drying and display tools show that their creations are valued and worthy of attention. They also help build classroom community and a sense of accomplishment.
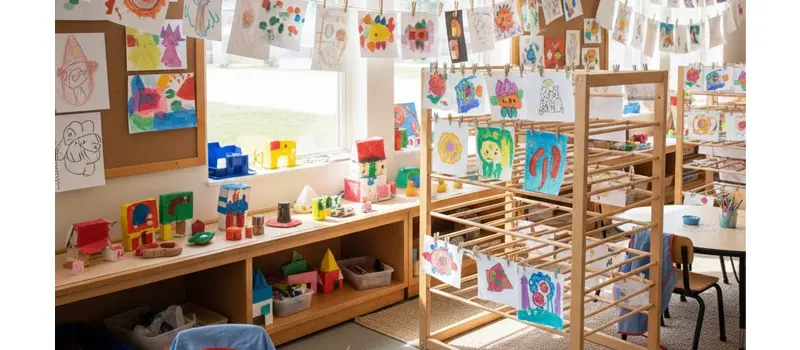
Suggested items include:
- Wooden or wire drying racks
- Wall-mounted display boards or cork boards
- Clips, clothespins, or art strings
- File folders for storing individual work
Outdoor Preschool Art Center: Expanding Creativity Beyond the Classroom
Taking art outdoors offers children new ways to explore, create, and connect with the world around them. Natural light, fresh air, and access to organic materials expand the possibilities for artistic expression. Whether it’s painting with mud, making leaf prints, or building sculptures with sticks and stones, an outdoor art center opens the door to sensory-rich, large-scale creativity that indoor spaces can’t always support.

Benefits of an Outdoor Preschool Art Center
- Enhanced sensory exploration: Children engage with real textures, colors, and smells found in nature, which deepens their artistic expression.
- Opportunities for gross motor development: Large-scale painting, sculpting, or chalk drawing allows children to move their whole bodies as they create.
- Decreased cleanup stress indoors: Messy projects like splatter painting or mud art can be enjoyed more freely in outdoor environments.
- Connection with nature: Outdoor art helps children build appreciation for the environment and encourages them to use natural items in creative ways.
- Flexible space for group collaboration: Larger spaces outdoors give children room to work together on big projects, promoting teamwork and communication.
Basic Setup for an Outdoor Preschool Art Center
Setting up an outdoor art space doesn’t require a permanent structure or elaborate design. With some planning and a few core supplies, you can create a functional, inspiring area that adapts to changing weather and activities.
- Choose a safe, accessible space that provides shade and enough room for multiple children to work. A patio, garden, or even a corner of the playground can work well.
- Use portable or weather-resistant furniture such as foldable tables, stools, or crate seating. Plastic trays or baskets help organize materials on the go.
- Create a defined art zone using outdoor rugs, logs, or visual boundaries so children understand where activities can take place.
- Plan for water access and cleanup with a hose, bucket, or nearby sink. Having wipes or towels on hand will also make transitions easier.
- Store supplies in waterproof containers and keep them in rolling carts or bins that can be moved in and out quickly based on the weather.
Outdoor-Friendly Materials and Tools
Not all indoor art supplies are suitable for outdoor use. Choose washable, weather-tolerant materials that are easy to clean and transport. Consider incorporating natural items directly into the art process, such as leaves, pebbles, flowers, or sand.
- Washable tempera paint and watercolors in spill-proof containers
- Sponge brushes, rollers, and nature brushes made from twigs or grass
- Large-format paper, cardboard panels, or recycled boxes for murals
- Sidewalk chalk, spray bottles, and paint rollers for large movements
- Mud, clay, sand, and water trays for sensory and textural play
- Natural collage materials like leaves, bark, seeds, petals, and small stones
- Aprons, smocks, and floor mats to keep children and clothing clean
How to Manage and Organize a Preschool Art Center?
Managing and organizing a preschool art center means creating a space where children can explore freely while maintaining order, safety, and independence. This balance is achieved by setting clear rules, arranging materials thoughtfully, and guiding children through consistent teacher support. When these elements work together, the art center becomes not only a place for creativity but also a space where children learn responsibility, collaboration, and care for their environment.
Setting Preschool Art Center Rules
Clear, simple rules help children use the space respectfully and safely. Rules should be introduced early, revisited often, and displayed visually at the child’s eye level.
Common and effective rules include:
- Use only what you need
- Return materials to their place when finished
- Keep art tools away from your mouth
- Raise your hand if you need help
- Clean your area before you leave
- Respect other people’s artwork and space
To increase understanding, pair each rule with images or icons. Reinforce these rules through daily routines, and celebrate positive behavior through encouragement rather than punishment.
Organizing Art Materials for Independent Use
An organized art center allows children to access materials confidently, make independent choices, and return items to their proper place without constant adult guidance. When materials are stored clearly and consistently, the space becomes calmer, cleaner, and more empowering for young learners.
- Sort by category: Group items like drawing tools, painting supplies, paper types, and collage materials in clearly marked sections.
- Use picture labels: Visual cues help pre-readers identify where items go, encouraging clean-up without constant adult reminders.
- Offer limited choices: Too many materials can overwhelm young children. Start with essentials and rotate new items regularly to maintain interest.
- Store in child-friendly containers: Use open-top bins, shallow trays, or caddies that are lightweight and easy for children to carry or slide on low shelves.
- Include a drying/display area: Create space for wet artwork to dry and finished pieces to be showcased. This adds a sense of value and closure to the creative process.
- Rotate materials regularly: Rather than overwhelming the center with every art supply, introduce a few core items and rotate others weekly or seasonally.
The Role of the Teacher in Managing the Art Center
The teacher’s role goes far beyond supervising the space. In a well-managed art center, the teacher acts as a facilitator, model, and guide. The teacher’s presence helps maintain order without limiting creative freedom.
- Modeling behavior: Teachers should demonstrate how to use materials properly, respect shared tools, and clean up after use. Children learn routines by watching consistent adult actions.
- Creating a predictable environment: A calm, respectful tone and clear structure help children feel safe to create. Teachers can also guide transitions in and out of the art area.
- Observing and supporting: Instead of giving step-by-step instructions, teachers can observe children’s creative processes, ask open-ended questions, and gently guide when needed.
- Encouraging ownership: Teachers can assign rotating responsibilities like “art helper” to involve children in maintaining the center.
Keeping the Art Center Clean and Ready to Use
Clean-up is not just the teacher’s job; it’s part of the learning process for children. A well-maintained art center teaches responsibility, promotes hygiene, and ensures materials last longer. To make cleaning effective and manageable, build it into the daily routine and set clear, age-appropriate expectations.
Encourage children to clean their work areas as part of finishing their projects. Provide accessible cleaning tools such as wipes, child-safe spray bottles, and small hand brooms. Label trash bins and recycling containers clearly, and keep them near the art center for easy use.
It’s also important to schedule regular deep cleaning for shared tools like scissors, glue caps, paintbrushes, and trays. At the end of each day or week, wipe down surfaces and inspect materials for damage or overuse. The cleaner the space stays, the more inviting and functional it remains—for both children and teachers.
8 Art Activities for Preschoolers
Once your preschool art center is set up and well-organized, having a few go-to art activities on hand can keep the space fresh and engaging. These activities should be open-ended, easy to manage, and adaptable for different age groups. Below are a few ideas that work well in most early childhood classrooms:
1. Sponge Painting
Children dip sponges into paint and press or dab them onto paper to create patterns and textures. They can use various sponge shapes or even cut their own from soft foam.
2. Nature Collage
Invite children to collect leaves, flowers, or small sticks during outdoor play. Back inside, they glue their items onto cardboard or paper to form designs or nature-inspired artwork.
3. Marble Rolling Art
Place a sheet of paper in a shallow tray or box, add drops of paint, then drop in a marble. Children tilt the tray to roll the marble through the paint, creating colorful lines across the page.
4. Watercolor and Salt Painting
Children brush liquid watercolor onto thick paper, then sprinkle salt over the wet paint. As the paint dries, the salt absorbs color and leaves behind interesting textures.
5. Paper Tearing Art
Give children colored paper to tear into pieces, then have them glue the pieces onto a background. They can create abstract art or build simple images like flowers, animals, or houses.
6. Recycled Material Collage
Provide a variety of safe, clean recyclables such as fabric scraps, cardboard bits, buttons, and yarn. Children choose items and glue them to a base to create unique mixed-media art.
7. Finger Painting
Spread non-toxic paint on trays or paper and encourage children to use their fingers to draw, swirl, and mix colors. This is especially fun when done standing at an easel or large table.
8. Group Mural on Butcher Paper
Lay out a large sheet of paper on the floor or tape it to a wall. Children use crayons, markers, or paint to contribute to a shared mural, drawing anything they like or working around a theme.
الأسئلة الشائعة
- What should a preschool art center look like?
It should be a child-friendly space with low tables, open shelves, and easy-to-reach art materials. The area should be clean, organized, and inviting, with room for both independent and group creativity. - How often should I rotate the materials in the art center?
It’s helpful to rotate materials every 1 to 2 weeks, or based on children’s interests. Seasonal changes, classroom themes, or new skills can guide your choices. Rotating supplies keeps the center fresh and engaging without overwhelming the children. - What if some children don’t seem interested in art activities?
Not every child will be drawn to traditional art projects. Offer a variety of materials and allow open-ended exploration. Some children may prefer sensory-based materials like clay or watercolors, while others might enjoy collaborative murals or nature-based projects. - What safety considerations are important in a preschool art center?
All materials should be non-toxic and age-appropriate. Scissors and tools should match children’s skill levels, and clear rules for use and clean-up should be established to maintain a safe and calm environment.
Conclusion: Bringing Art Center to Your Preschool
Creating a preschool art center doesn’t require a large budget or a perfect setup—it starts with intention. By focusing on accessible materials, thoughtful organization, and a supportive routine, you can build a space where creativity thrives every day. Whether you’re working with a small classroom corner or designing a dedicated area, what matters most is offering children the freedom to explore, express, and create in their own way.
Start small, stay flexible, and let the children lead. With time, your art center will become one of the most joyful and meaningful parts of the preschool experience.